
This handwritten digit classification mini project makes use of machine learning algorithms like Decision Tree or Random forest to create a model on MNIST dataset. We are using Flask to create frontend UI.
Overview
Handwritten digit classification is a fundamental problem in the field of machine learning and computer vision. It involves the task of identifying and recognizing handwritten digits from images. This problem has numerous real-world applications, including optical character recognition (OCR), digitized document processing, and postal mail sorting. In this article, we’ll explore the process of handwritten digit classification using various machine learning algorithms.
Data Preparation
The foundation of any machine learning task is data preparation. For handwritten digit classification, we typically use a dataset like the MNIST dataset, which contains a large collection of grayscale images of handwritten digits ranging from 0 to 9. Each image is of size 28×28 pixels, resulting in 784 features per image. Download dataset from here.
Model Selection
Several machine learning algorithms can be applied to the task of handwritten digit classification such as Support Vector Machines (SVM), KNN, Decision Trees and Random Forests, CNNs. For our mini project we are gonna try only Decision Trees and Random Forests.
Model Training and Evaluation
Get Data
import numpy as np
import pandas as pd
import matplotlib.pyplot as plt
%matplotlib inline

data = pd.read_csv('train.csv')
Show preview of data
data.sample(5)Divide the data into two parts, input and output variables.
X = data.iloc[:,1:].values
y = data.iloc[:,0:1].values
Use train test and split for training and testing purposes.
from sklearn.model_selection import train_test_split
X_train, X_test, y_train, y_test = train_test_split(X, y, test_size=0.2, random_state=9)
Train the model using decision tree classifier and predict it with test data. Also check for accuracy score of the model to understand how well the model is performing.
from sklearn.tree import DecisionTreeClassifier
clf = DecisionTreeClassifier()

clf.fit(X_train, y_train)

y_pred = clf.predict(X_test)

from sklearn.metrics import accuracy_score
accuracy_score(y_test, y_pred)
You can also make use of Random Forest algorithm instead of Decision Tree like below:
from sklearn.ensemble import RandomForestClassifier
rforest = RandomForestClassifier()
rforest.fit(X_train , y_train)

y_pred = rforest.predict(X_test)

from sklearn.metrics import accuracy_score
accuracy_score(y_test, y_pred)
Now lets see any of the image of digit and predict it with newly created model.
plt.imshow(X_test[100].reshape(28, 28))

clf.predict(X_test[100].reshape(1, 784))
Now lets put our model into a file name ‘model‘ using pickle, so that we can use it later in our app.
import bz2file as bz2
import pickle

def compressed_pickle(title, data):
  with bz2.BZ2File(title + '.pbz2', 'w') as f:
    pickle.dump(data, f)

compressed_pickle('model', clf)
Now the model has created, lets create the app using Flask. Create ‘app.py‘ file in our app.
import numpy as np
from flask import Flask, request, jsonify, render_template
import pickle
import bz2file as bz2
from PIL import Image

## Function to decompress the model
def decompress_pickle(file):
  data = bz2.BZ2File(file, 'rb')
  data = pickle.load(data)
  return data


# Extract countvectorizer object and the model
model = decompress_pickle('model2.pbz2')

## Function to convert image into pixel values
def convert_grayscale(file):
    # Load the image
    image = Image.open(file)

    # Resize the image to 28x28 pixels
    image = image.resize((28, 28))

    # Convert the image to grayscale
    image = image.convert("L")

    # Extract pixel values into 2D array
    pixel_data = np.array(image)

    return pixel_data

## FUnction to predict the stock movement
def predict_digit(grayscale_data):
  my_prediction = model.predict(grayscale_data.reshape(1, 784))
  return my_prediction

app = Flask(__name__)

@app.route('/')
def home():
    return render_template('index.html')


@app.route('/predict',methods=['POST'])
def predict():
    '''
    For rendering results on HTML GUI
    '''
    if 'file' not in request.files:
        return 'No file part'

    file = request.files['file']

    if file.filename == '':
        return 'No selected file'

    # convert file into grayscale
    grayscale_data = convert_grayscale(file)

    prediction = predict_digit(grayscale_data)

    return render_template('index.html', prediction=prediction)


if __name__ == "__main__":
    app.run(debug=True)
We have created the app.py file, now lets create the html code for ‘index.html‘ file.
<!DOCTYPE html>
<html lang="en">
<head>
    <meta charset="UTF-8">
    <meta name="viewport" content="width=device-width, initial-scale=1.0">
    <title>Document</title>
    <style>
        body {
            background-color: rgb(216, 195, 154);
        }
        .container {
            text-align: center; /* Center align the content within the container */
        }
        .img1 {
            display: block;
            margin-left: auto;
            margin-right: auto;
        }
        .myButton {
            padding: 10px 20px; /* Set padding for the button */
            font-size: 16px; /* Set font size for the button */
            font-family: Arial, sans-serif; /* Set font family for the button */
            background-color: #4CAF50; /* Set background color for the button */
            color: white; /* Set text color for the button */
            border: none; /* Remove border */
            border-radius: 5px; /* Add border radius */
            cursor: pointer; /* Change cursor to pointer on hover */
            text-decoration: none; /* Remove underline */
            transition: background-color 0.3s ease; /* Add smooth transition for background color */
        }

        /* Hover effect for the button */
        .myButton:hover {
            background-color: #45a049; /* Change background color on hover */
        }
    </style>
    <script>

        // display the selected image
        function showImage() {
            var input = document.getElementById("uploadInput");
            var img = document.getElementById("uploadedImage");

            input.onchange = function(event) {
                var file = event.target.files[0];
                var reader = new FileReader();

                reader.onload = function(event) {
                    img.src = event.target.result;
                    img.style.display = "block";
                }

                reader.readAsDataURL(file);
            };

            input.click();
        }
    </script>
</head>
<body>
    <div class="container" style="text-align: center; padding-top: 0.3%;">
        <h1>Upload Image To Classify</h1>
    </div>
    <div style="text-align: center; padding-top: 2.3%;">
        <form action="{{ url_for('predict')}}" method="post" id="uploadForm" enctype="multipart/form-data">
            <input type=file name=file id="uploadInput" style="display: none;" accept=".png, .jpg, .jpeg" required>
            <button class="myButton" onclick="showImage()">Upload Image</button>

            <div class="button" style="text-align: center; padding-top: 4.3%;">
                <button type=submit value=Upload class="myButton" style="cursor:pointer; text-align: center;" hover="background-color:blue;"><b>PREDICT</b></button>
            </div>
        </form>
    </div>

    <div class="container" style="text-align: center; padding-top: 2.3%;">
        <img class="img1" id="uploadedImage" style="display: none; max-width: 300px;">
    </div>

    <div class="result" align="center">
		{% if prediction==0 %}
			<h1><p style="padding: 0.3%; color:rgb(134, 39, 201)"><b>The Digit is 0</b></p></h1>
		{% elif prediction==1 %}
			<h1><p style="padding: 0.3%; color:rgb(134, 39, 201)"><b>The Digit is 1</b></p></h1>
        {% elif prediction==2 %}
			<h1><p style="padding: 0.3%; color:rgb(134, 39, 201)"><b>The Digit is 2</b></p></h1>
        {% elif prediction==3 %}
			<h1><p style="padding: 0.3%; color:rgb(134, 39, 201)"><b>The Digit is 3</b></p></h1>
        {% elif prediction==4 %}
			<h1><p style="padding: 0.3%; color:rgb(134, 39, 201)"><b>The Digit is 4</b></p></h1>
        {% elif prediction==5 %}
			<h1><p style="padding: 0.3%; color:rgb(134, 39, 201)"><b>The Digit is 5</b></p></h1>
        {% elif prediction==6 %}
			<h1><p style="padding: 0.3%; color:rgb(134, 39, 201)"><b>The Digit is 6</b></p></h1>
        {% elif prediction==7 %}
			<h1><p style="padding: 0.3%; color:rgb(134, 39, 201)"><b>The Digit is 7</b></p></h1>
        {% elif prediction==8 %}
			<h1><p style="padding: 0.3%; color:rgb(134, 39, 201)"><b>The Digit is 8</b></p></h1>
        {% elif prediction==9 %}
			<h1><p style="padding: 0.3%; color:rgb(134, 39, 201)"><b>The Digit is 9</b></p></h1>
        {% endif %}
	</div>

</body>
</html>
Note: Make sure you keep your model.pbz2 file in the same folder as your app.
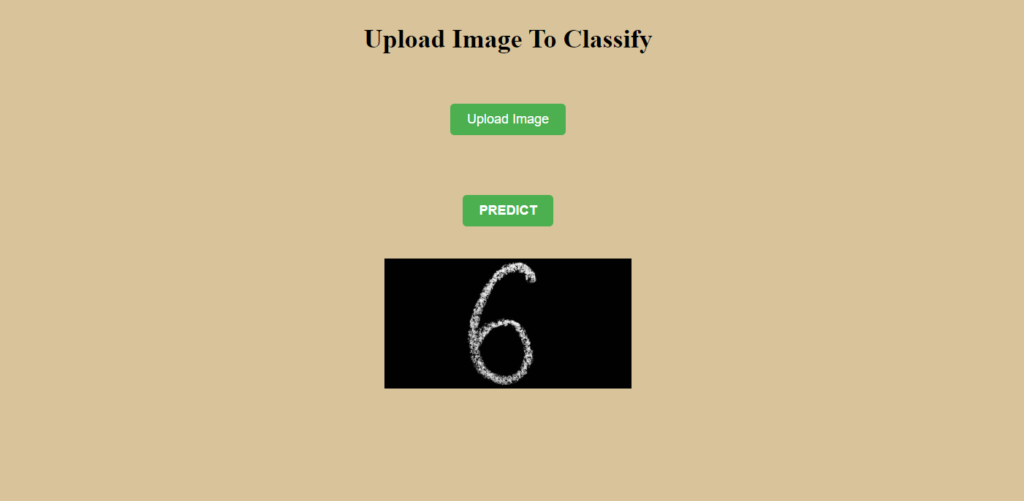
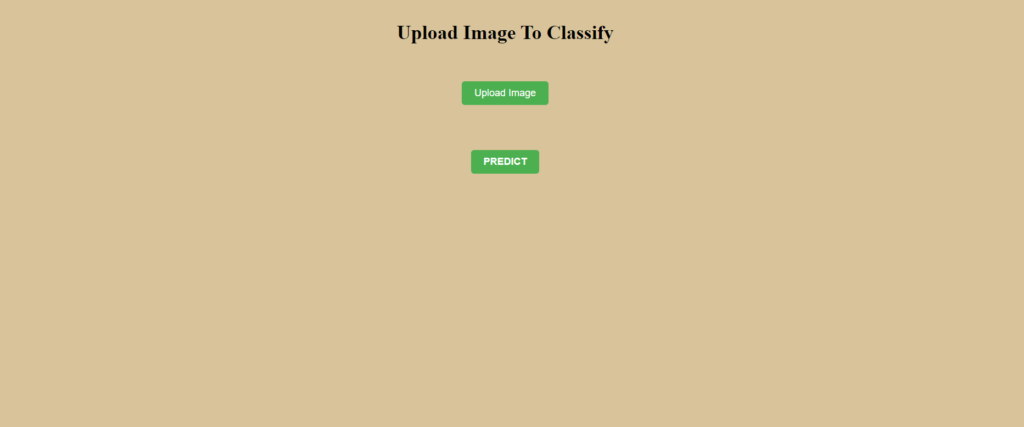
Once you run the app, you will see something like this below.
The full code for this mini project is here.