In the modern era of digital communication, chatbots have emerged as essential tools for online interaction, providing both businesses and users with a user-friendly means of communication and information retrieval. This article delves into the creation of a basic chatbot utilizing GPT-2, an open-source Large Language Model (LLM). It covers the process of building the chatbot and demonstrates its capability to engage users in natural language conversations.
Overview of the Project
Our chatbot project aims to create a basic conversational interface where users can interact with the chatbot by sending text messages. The chatbot will use the GPT-2 model to generate responses based on the input provided by the user, allowing for dynamic and contextually relevant interactions. User will simply put input and model will try to predict the next words of the sentence.
We are not making use of high level resources like GPUs, instead we are implementing it in our CPU environment. We need Python, Flask and HuggingFace LLM model with Transformer library.
Chatbot Implementation
Create virtual environment:
We are implementing our project in VS code studio editor. Let’s create the virtual environment in it. Open the VS code terminal and type the below command to create environment and install python version 3.9 (Note: you can use any python version of your choice). Also activate the environment.
conda create -p venv python==3.9 -yactivate venvOnce the virtual environment is setup, create the below folder structure for our project in VS code.
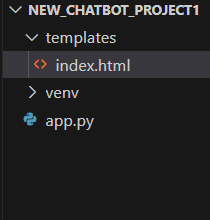
In above structure, we created the app.py file for flask server. Create a templates folder as well inside which the index.html file will have all UI related HTML and JavaScript code.
Install necessary libraries:
Go to the terminal of VS code and install Flask using below command.
pip install FlaskOnce it is done we can go ahead and install Transformer library. The Transformer library is a powerful toolkit for working with transformer-based models in natural language processing (NLP). It provides implementations of state-of-the-art transformer architectures, such as BERT, GPT, and T5, along with pre-trained models.
pip install git+https://github.com/huggingface/transformersIt will take some time to install based on your resources. In short, the Transformer library allows developers and researchers to easily access and use transformer-based models for tasks such as text classification, language generation, machine translation, and more. It provides a wide range of functionalities, including model loading, tokenization, inference, and training, making it a valuable resource for NLP practitioners.
From Transformers, we are using two modules such as GPT2Tokenizer, GPT2LMHeadModel. Let’s see why we need it.
GPT-2 Tokenizer:
- The GPT-2 Tokenizer is a component of the Transformers library that is used to tokenize input text data into numerical representations that can be processed by the GPT-2 model.
- Tokenization involves splitting the input text into individual tokens (words, subwords, or characters) and converting them into corresponding numerical IDs.
- The GPT-2 Tokenizer handles tasks such as encoding and decoding text, padding sequences, and generating attention masks to indicate which tokens should be attended to by the model.
- It is essential for preparing input data for feeding into the GPT-2 model during both training and inference stages.
GPT-2 LM Head Model:
- The GPT-2 LM (Language Model) Head Model is the core component of the GPT-2 architecture responsible for language modeling tasks.
- It consists of multiple layers of transformer blocks, each containing self-attention mechanisms and feedforward neural networks.
- The GPT-2 LM Head Model takes tokenized input sequences and processes them through its layers to generate predictions for the next token in the sequence.
- During training, the model learns to predict the next token based on the context provided by the preceding tokens in the sequence.
- The GPT-2 LM Head Model is pre-trained on large text corpora to learn general language patterns and can be fine-tuned on specific datasets for downstream NLP tasks such as text generation, question answering, and sentiment analysis.
Create app.py file:
This is the app.py file from where flask python server will run.
from flask import Flask, request, jsonify, render_template
from transformers import GPT2Tokenizer, GPT2LMHeadModel

# Initialize Flask application
app = Flask(__name__)

# Route to serve the index.html page
@app.route('/')
def index():
    return render_template('index.html')

# Initialize the GPT-2 tokenizer and model
tokenizer = GPT2Tokenizer.from_pretrained("gpt2")
model = GPT2LMHeadModel.from_pretrained("gpt2")

# Define route to handle user messages and generate chatbot response
@app.route('/get-response', methods=['POST'])
def get_response():
    # Get the user message from the request
    user_message = request.json.get('message')

    # Process the user message and generate the chatbot response
    chatbot_response = generate_chatbot_response(user_message)

    # Print the chatbot response to the terminal
    print("Chatbot Response:", chatbot_response)

    # Return the chatbot response as JSON
    return jsonify({'response': chatbot_response})

# Function to generate chatbot response
def generate_chatbot_response(user_message):
    # Tokenize the user message
    input_ids = tokenizer.encode(user_message, return_tensors="pt")

    # Generate response using the GPT-2 model
    chatbot_output = model.generate(input_ids, max_length=50, num_return_sequences=1)

    # Decode the generated response
    chatbot_response = tokenizer.decode(chatbot_output[0], skip_special_tokens=True)

    return chatbot_response

# Run the Flask application
if __name__ == '__main__':
    app.run(debug=True)
In above code, we imported the necessary library and created the route to render index.html page template. Then we initialized the GPT-2 tokenizer and model. After this we defined the route to handle user messages and generate chatbot response.
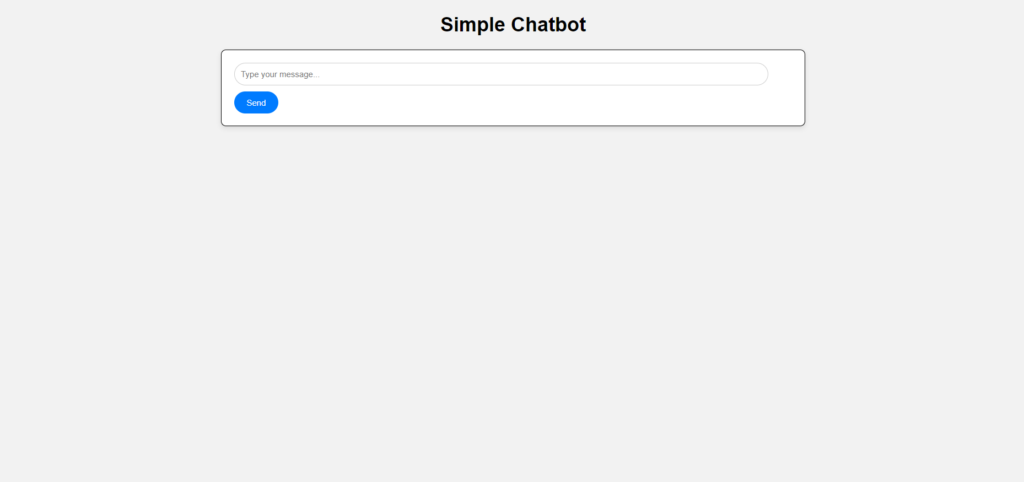
Create index.html file:
This file contains the html code for our chatbot. It simply contains the heading, input field and a send button with JavaScript logic. We also put CSS code into the same file.
<!DOCTYPE html>
<html lang="en">
<head>
    <meta charset="UTF-8">
    <meta name="viewport" content="width=device-width, initial-scale=1.0">
    <title>Simple Chatbot</title>
    <style>
        /* CSS styling here */

        /* Global styles */
    body {
        font-family: Arial, sans-serif;
        background-color: #f2f2f2;
        margin: 0;
        padding: 0;
    }

    h1 {
        text-align: center; /* Center align the heading */
    }

    .container {
        max-width: 500px;
        margin: 0 auto;
        padding: 20px;
    }

    /* Chat container */
    #chat-container {
        max-width: 900px;
        max-width: 700px;
        background-color: #fff;
        border-radius: 8px;
        box-shadow: 0 4px 8px rgba(0, 0, 0, 0.1);
        padding: 20px;
        margin: 0 auto;
        border: 1px solid black;
    }

    /* Chat history */
    #chat-history {
        overflow-y: auto;
        max-height: 300px;
    }

    /* User message */
    .user-message {
        background-color: #007bff;
        color: #fff;
        border-radius: 20px;
        padding: 10px 15px;
        margin-bottom: 10px;
        display: inline-block;
    }

    /* Chatbot message */
    .bot-message {
        background-color: #6c757d;
        color: #fff;
        border-radius: 20px;
        padding: 10px 15px;
        margin-bottom: 10px;
        display: inline-block;
    }

    /* Input field and button */
    #user-input {
        width: calc(100% - 60px);
        padding: 10px;
        border: 1px solid #ccc;
        border-radius: 20px;
        margin-right: 10px;
    }

/* Styles for the send button */
#send-button {
            background-color: #007bff; /* Blue background color */
            color: #fff; /* White text color */
            border: none; /* Remove border */
            border-radius: 20px; /* Rounded corners */
            padding: 10px 20px; /* Padding */
            cursor: pointer; /* Cursor style */
            transition: background-color 0.3s ease; /* Smooth transition */
        }

        /* Hover effect for the send button */
        #send-button:hover {
            background-color: #0056b3; /* Darker blue on hover */
        }

    </style>
</head>
<body>
    <h1>Simple Chatbot</h1>
    <div id="chat-container">
        <div id="chat-history">
            <!-- Chat history will be displayed here -->
        </div>
        <input type="text" id="user-input" placeholder="Type your message...">
        <div style="padding-top: 10px;">
        <button id="send-button" onclick="sendMessage()">Send</button>
        </div>
    </div>

    <script>
        function sendMessage() {
            // Get the user input message from the input field
            var userInput = document.getElementById("user-input").value;

            // Display the user message in the chat history
            var chatHistory = document.getElementById("chat-history");
            var userMessageElement = document.createElement("div");
            userMessageElement.classList.add("user-message");
            userMessageElement.textContent = "You: " + userInput;
            chatHistory.appendChild(userMessageElement);

            // Clear the input field after sending the message
            document.getElementById("user-input").value = "";

            // Make an API call to your server to send the user message and receive the chatbot response
            fetch('/get-response', {
                method: 'POST',
                headers: {
                    'Content-Type': 'application/json'
                },
                body: JSON.stringify({
                    message: userInput
                })
            })
            .then(response => response.json())
            .then(data => {
                // Display the chatbot's response in the chat history
                var botMessageElement = document.createElement("div");
                botMessageElement.classList.add("bot-message");
                botMessageElement.textContent = "Chatbot: " + data.response;
                chatHistory.appendChild(botMessageElement);
            })
            .catch(error => {
                console.error('Error:', error);
            });
        }
    </script>

</body>
</html>
In above code, we implemented the UI interface for our chatbot. Here in JavaScript tag, we make an API call to your server to send the user message and receive the chatbot response using POST request. Then we display the chatbot’s response in the chat history. The interface includes an input field where users can type their messages and a chat history area where the conversation will be displayed.
We implemented a backend server using Python and Flask to handle user messages and generate chatbot responses. We leveraged the GPT-2 model from Hugging Face’s transformers library to generate responses based on the input provided by the user.
We integrated the frontend and backend components to create a seamless user experience. User messages are sent to the server via HTTP requests, where they are processed by the GPT-2 model. The generated responses are then returned to the frontend and displayed to the user in real-time.
We tested our chatbot to ensure that it functions as expected. Run the below command to open chatbot on your default browser.
python app.py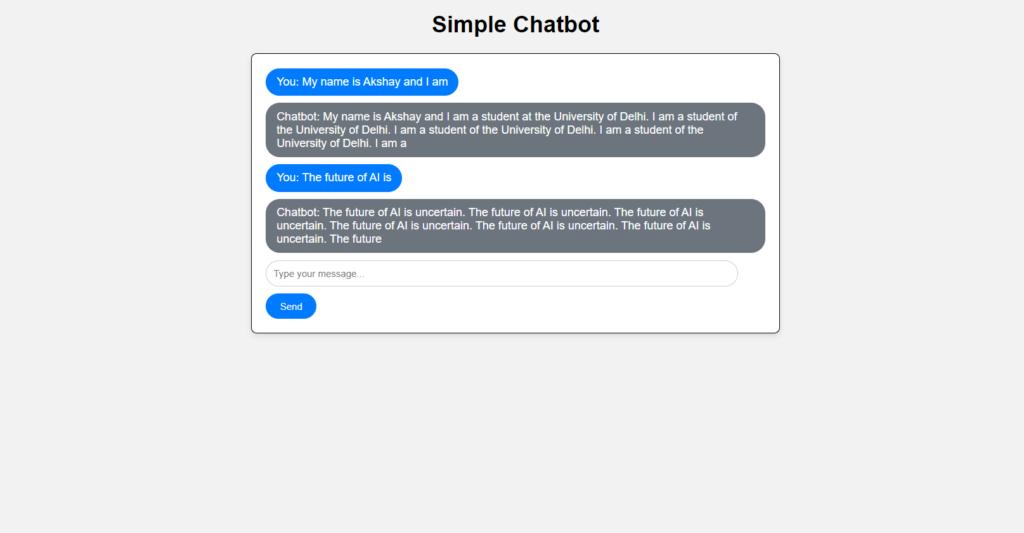
Conclusion
Building a simple chatbot with the open-source GPT-2 model has been an enlightening experience, showcasing the power of natural language processing and machine learning technologies. With the ability to generate contextually relevant responses, our chatbot provides users with a seamless and engaging conversational experience. As chatbot technology continues to evolve, it will play an increasingly important role in how we interact with technology and access information online.
In summary, our project demonstrates the potential of open-source LLM models like GPT-2 to enable the development of intelligent and conversational chatbots that can enhance user engagement and streamline communication in various domains.