
Let’s walk through this beginner Snowflake project step-by-step. This project will teach you how to build a batch ingestion pipeline, where new data is automatically ingested from AWS S3 into Snowflake without Snowpipe. The goal is to automatically load new CSV files from AWS S3 into a Snowflake table using the COPY INTO command. We need to setup S3 and Snowflake integration.
STEP 1: Save CSV Files to S3
What you need:
- An AWS S3 bucket (create one if you don’t have it with the name as ‘my-snowflake-demo-bucket‘).
- A CSV file with sample data you can download from GitHub (e.g., employees.csv).
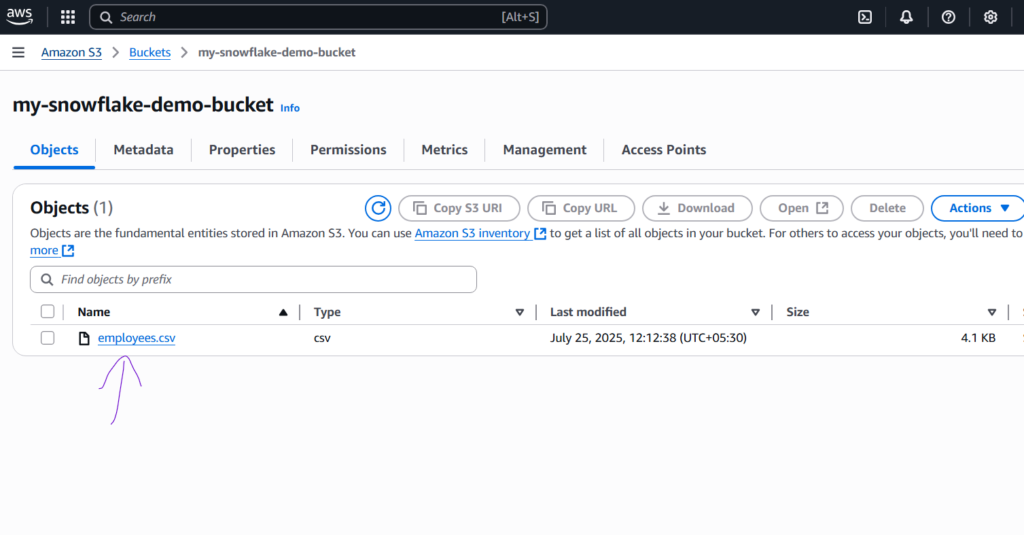
Upload this file to S3:
- AWS Console → S3 → Your Bucket → Create Folder as “sourcefolder” → “Upload” → Upload
employees.csv - Note down the bucket name and path.
STEP 2: Create a Stage in Snowflake
A stage tells Snowflake where to look for the data (in this case, your S3 bucket).
Prerequisites:
- Snowflake account
- An active Snowflake worksheet session
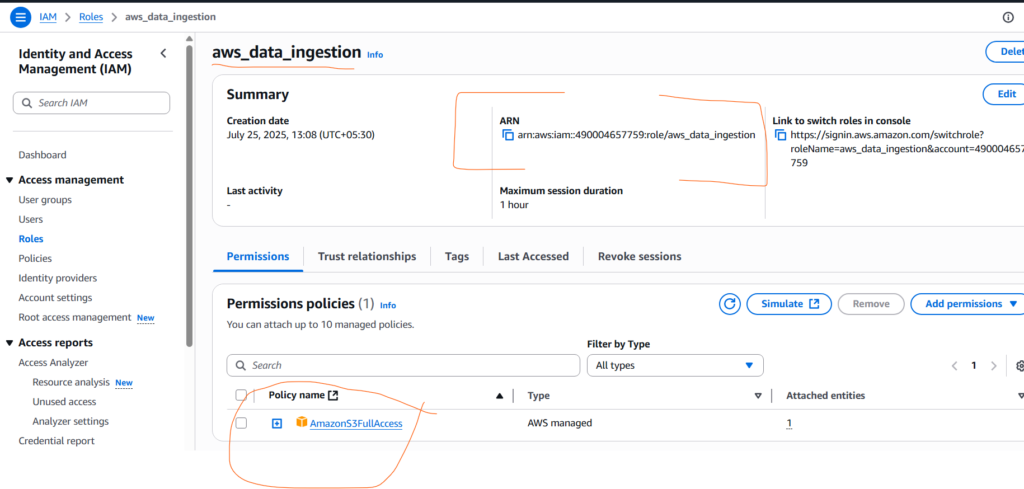
- An AWS IAM role with programmatic access +
AmazonS3FullAccess
Before this, you need to create the STORAGE_INTEGRATION. Creating this storage integration has some benefits like we can list and see the preview of data from the stages before loading data from stage to snowflake tables.
How to Create STORAGE_INTEGRATION:
CREATE OR REPLACE STORAGE INTEGRATION my_s3_integration
  TYPE = EXTERNAL_STAGE
  STORAGE_PROVIDER = S3
  ENABLED = TRUE
  STORAGE_AWS_ROLE_ARN = 'arn:aws:iam::your-account-id:role/snowflake-s3-access'
  STORAGE_ALLOWED_LOCATIONS = ('s3://my-snowflake-bucket/raw/');
SQL to Create an External Stage: (Create File Format First)
-- Create an External Stage
CREATE OR REPLACE STAGE my_s3_stage
  FILE_FORMAT = my_csv_format
  URL = 's3://my-snowflake-demo-bucket/sourcefolder/'
  STORAGE_INTEGRATION = my_s3_integration;
You must set up an IAM Role in AWS that Snowflake can assume, with policies like AmazonS3FullAccess. While creating the IAM role make sure to select External ID check box (put some dummy values here for now).
Now run the below SQL statement to describe storage integration and copy the Storage AWS External ID and Storage AWS IAM USER ARN.
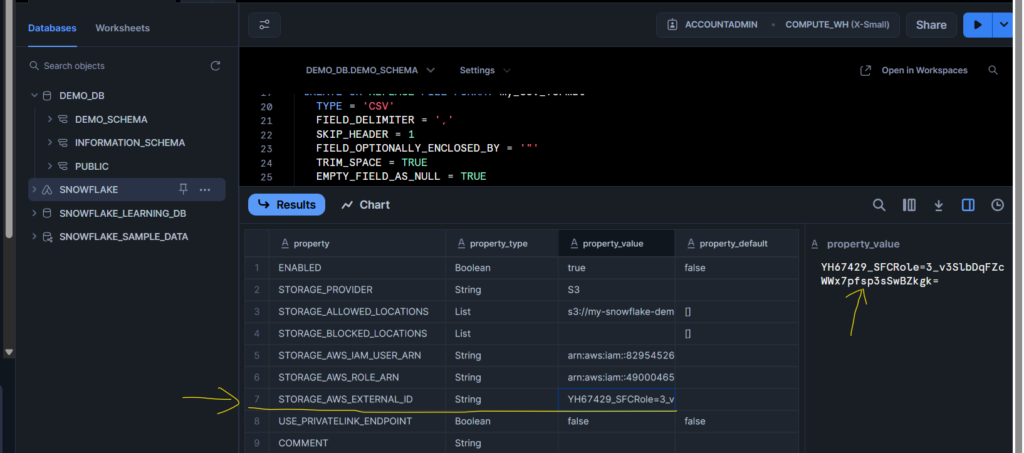
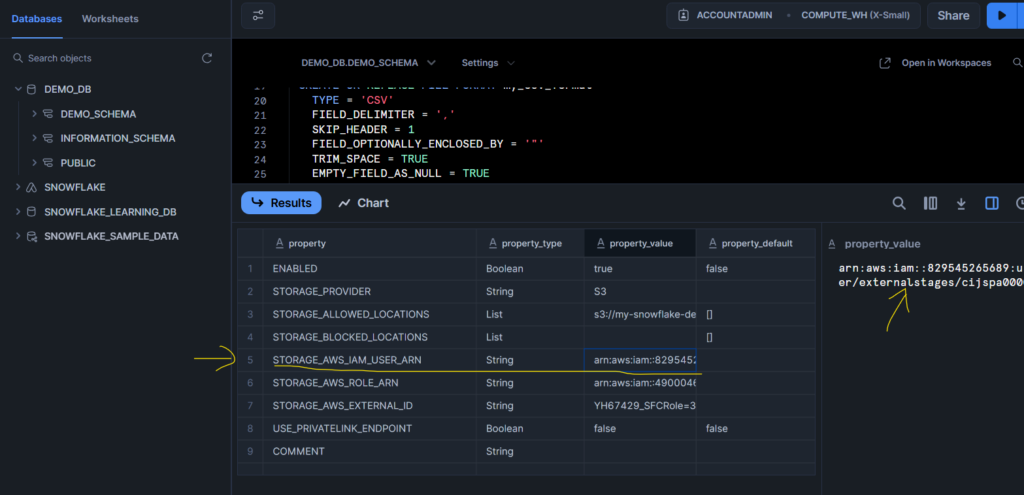
Once copied, go to the AWS IAM role that you created where go to the Trust Relationship section and put all these two copied values in respected filed as shown below.

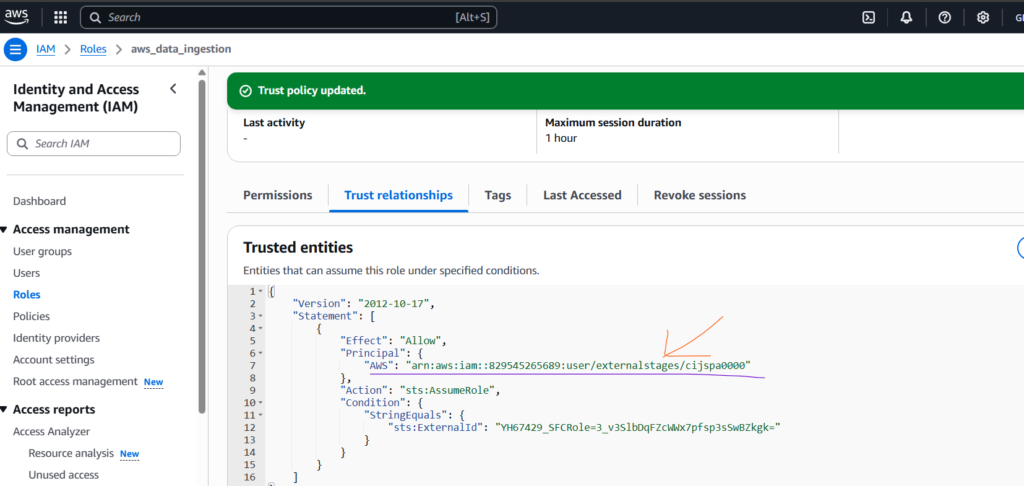
Now there is a perfect handshake between AWS S3 storage and Snowflake.
STEP 3: Define a File Format
Tell Snowflake what type of file you’re loading (CSV, headers, delimiters, etc.). Create this file format before creating the External Stage.
CREATE OR REPLACE FILE FORMAT my_csv_format
  TYPE = 'CSV'
  FIELD_DELIMITER = ','
  SKIP_HEADER = 1
  FIELD_OPTIONALLY_ENCLOSED_BY = '"'
  TRIM_SPACE = TRUE
  EMPTY_FIELD_AS_NULL = TRUE
  COMPRESSION = 'AUTO';
STEP 4: Create a Table in Snowflake
You need a table to load the data into.
-- Create a Table in Snowflake
CREATE OR REPLACE TABLE employees (
    emp_id INT,
    first_name STRING,
    last_name STRING,
    department STRING,
    salary NUMBER,
    hire_date DATE
);
Once all this done we can run these below statements to preview the external stage data as well.
LIST @my_s3_stage;

SELECT $1, $2, $3 FROM @my_s3_stage;
STEP 5: Load Data using COPY INTO
This command pulls data from S3 via the stage and loads it into your Snowflake table.
COPY INTO employees
FROM @my_s3_stage;
This command runs in batch and loads the entire file. After this by querying the employees table you should see the data from your CSV file with below SQL statement.
SELECT * FROM employees;Remember, if you remove the external stage from Snowflake worksheet, all data from the S3 bucket will be gone. Because we have given the AmazonS3FullAccess role to the user.
Automate Data Loading (Optional)
You can automate this using Snowpipe (for real-time data ingestion) — but for now, your goal is batch ingestion using COPY INTO. If you want you can refer to this video for more info, and if you want to implement storage integration with Snowpipe then use this video.